
Rider plugin
Install from the JetBrains Marketplace
— My EF Vibe for Rider.
The plugin runs the efvibe CLI from Rider and shows query results,
SQL, query plans, model metadata, scan findings, and notebook output in a native tool window.
DbContext.
Step-by-step: set up your Rider workflow
Use this walkthrough to install the plugin, configure it for your current Rider project, and run
LINQ against your real EF Core DbContext.
-
Install prerequisites
The Rider plugin shells out to the
efvibeCLI, so install the CLI first.- .NET SDK - same major version as your EF project.
- efvibe CLI - install from NuGet, restore it as a local tool, or build it from source.
dotnet tool install --global efvibe
# or, in a repo with a dotnet-tools manifest:
dotnet tool restore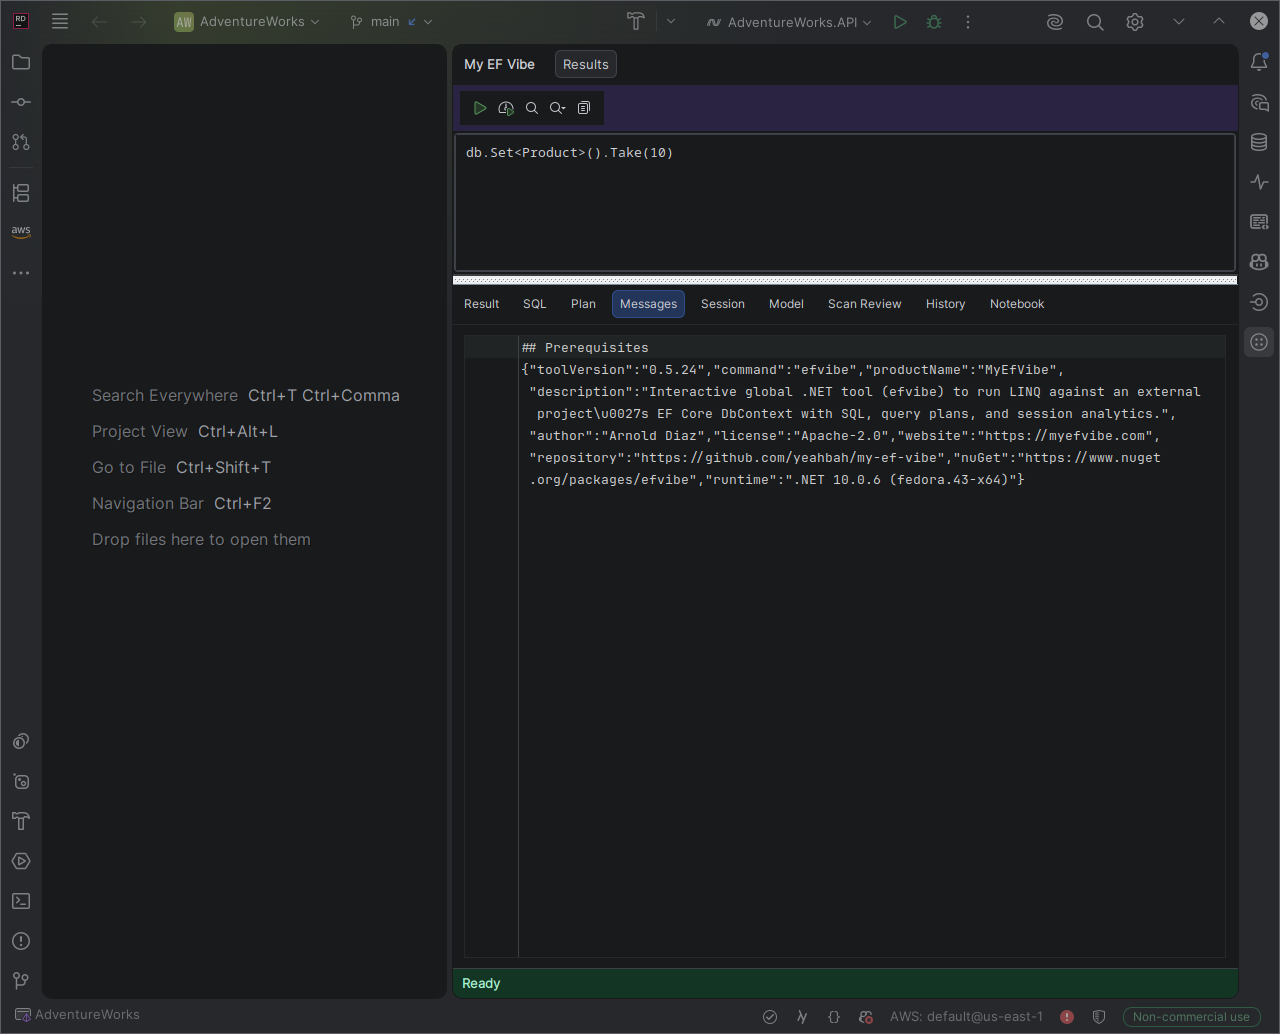
Confirm the CLI works before installing the Rider plugin. -
Install the plugin
Recommended: install from the JetBrains Marketplace.
In Rider:
- Open Settings > Plugins.
- Open the Marketplace tab.
- Search for efvibe or My EF Vibe.
- Click Install and restart Rider when prompted.
From a browser, open plugins.jetbrains.com/plugin/31961-my-ef-vibe and use Install to Rider.
Alternative: for local development builds, use Settings > Plugins > gear > Install Plugin from Disk... and select the ZIP from
rider-extension/build/distributions/.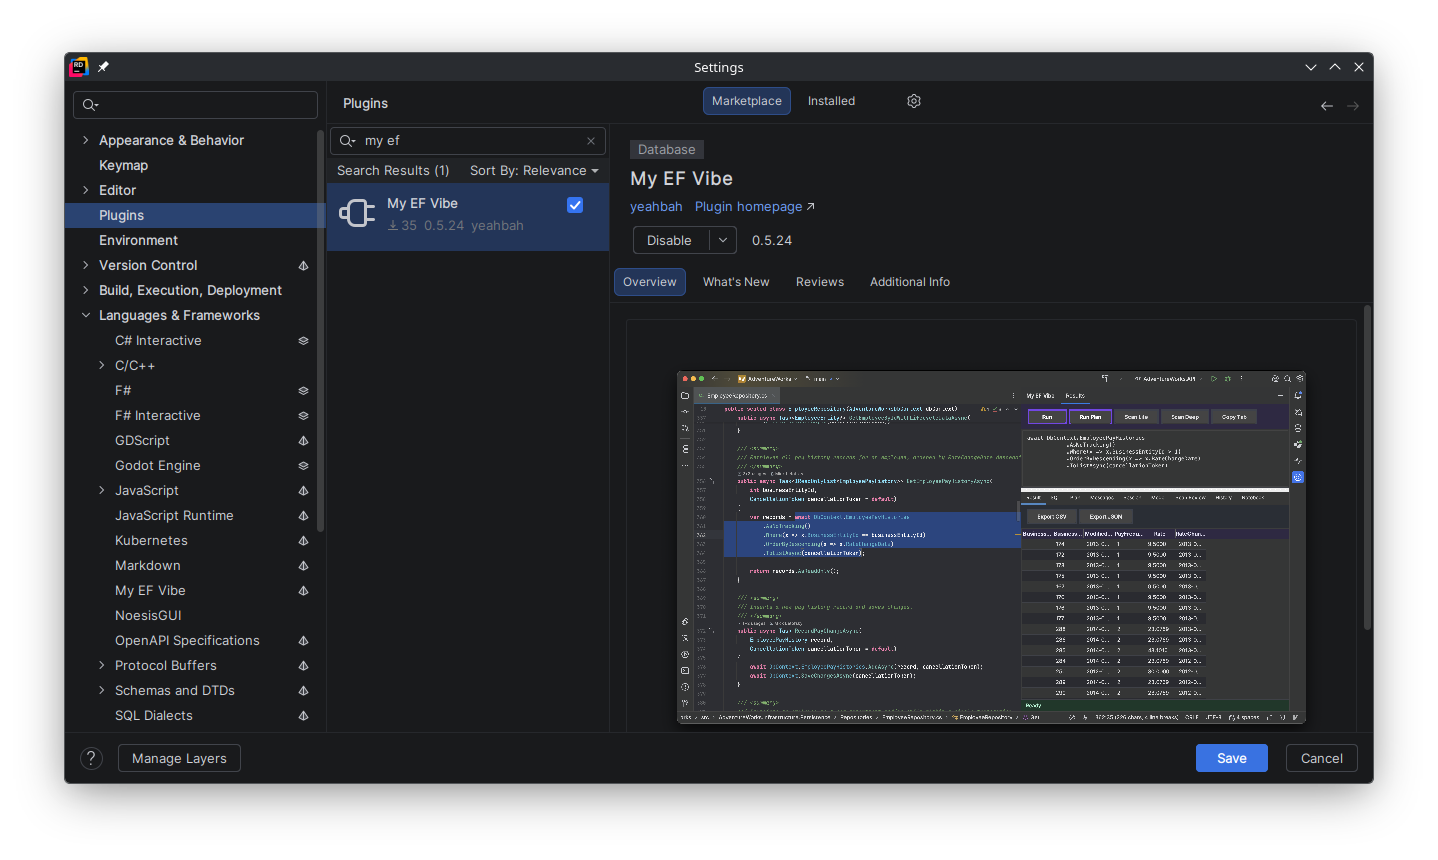
Marketplace install — fastest path for most teams. -
Open your solution
Open the .NET solution that contains your EF Core project. Relative paths in settings resolve from the Rider project or solution directory.
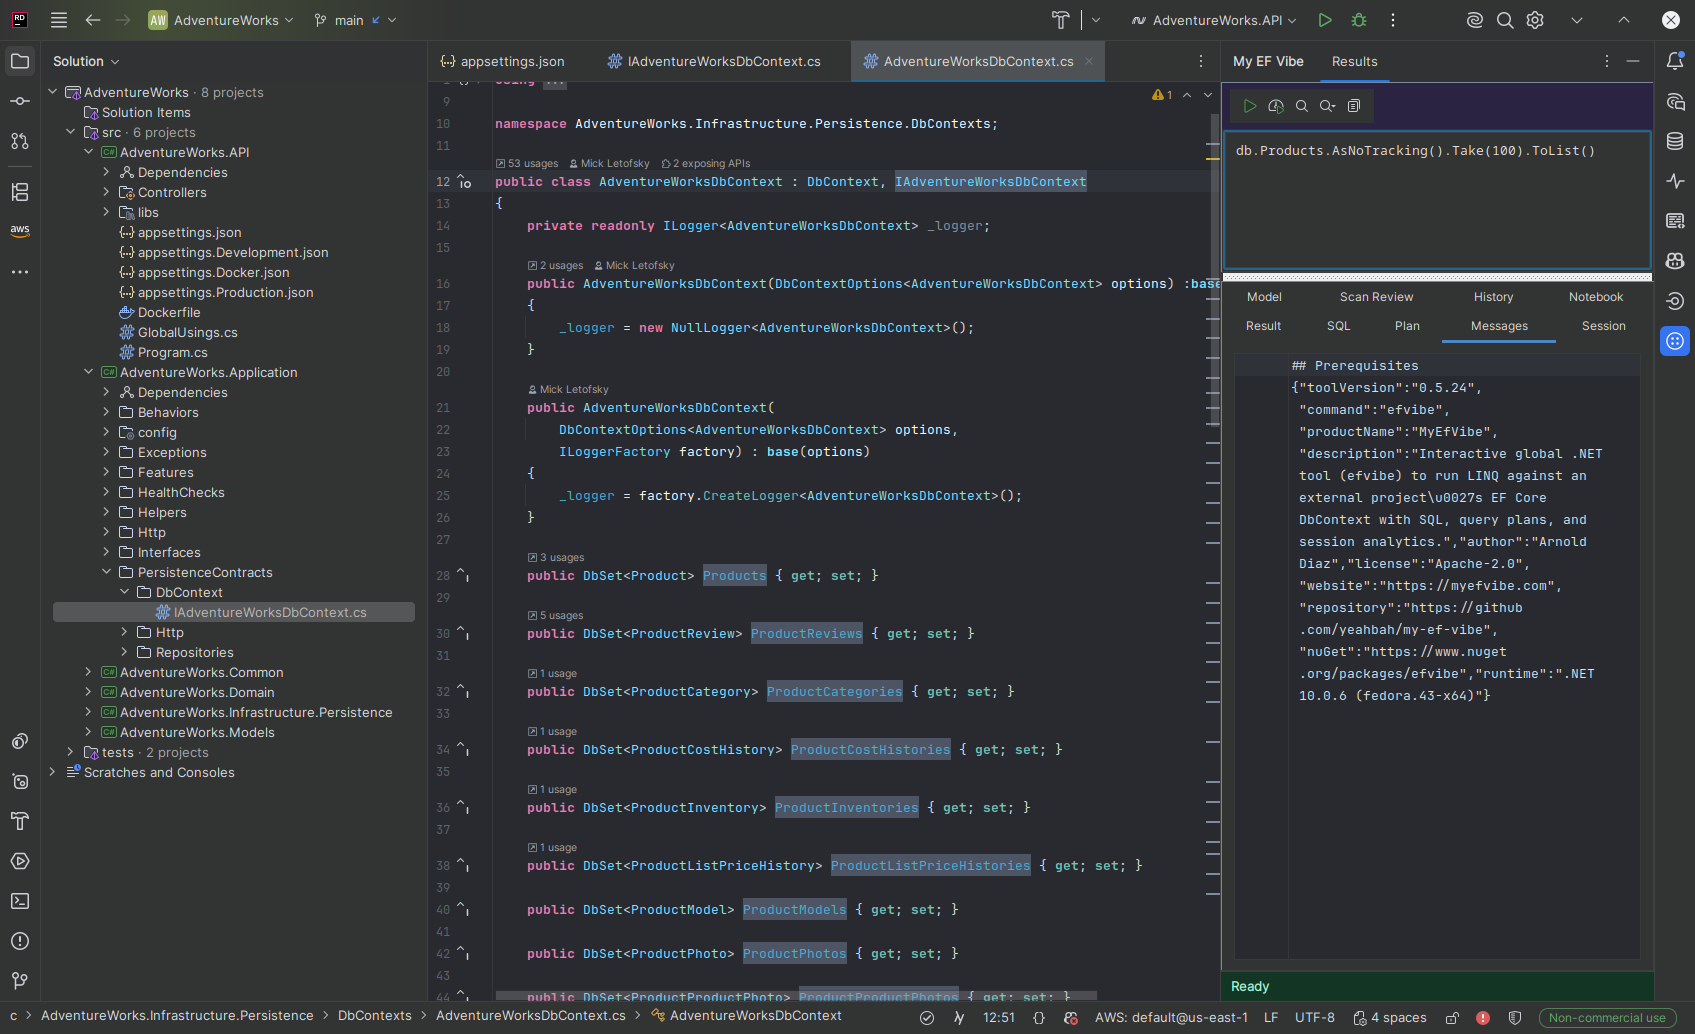
Open the full solution, not just an individual source file. -
Configure project settings
Open Settings > Languages & Frameworks > My EF Vibe for the current project.
Setting What to enter EF project The .csprojthat contains or references yourDbContext.Startup project The app project with appsettings*.jsonor user secrets.DbContext The context type name, for example AdventureWorksDbContext.Workspace root Optional session/output root. Leave blank to use the CLI default. Provider / connection string Optional overrides when the startup project does not provide configuration. efvibe executable Optional explicit path to efvibeormyefvibe.Paths can be absolute, solution-relative, or use
${workspaceFolder}/$(SolutionDir).EF project: src/AdventureWorks.Infrastructure.Persistence/AdventureWorks.Infrastructure.Persistence.csproj Startup project: src/AdventureWorks.API/AdventureWorks.API.csproj DbContext: AdventureWorksDbContextRider stores these settings per project in workspace state, usually
.idea/workspace.xmlor.idea/.idea.<SolutionName>/.idea/workspace.xml. Look forMyEfVibeSettings. This user-local file normally should not be committed.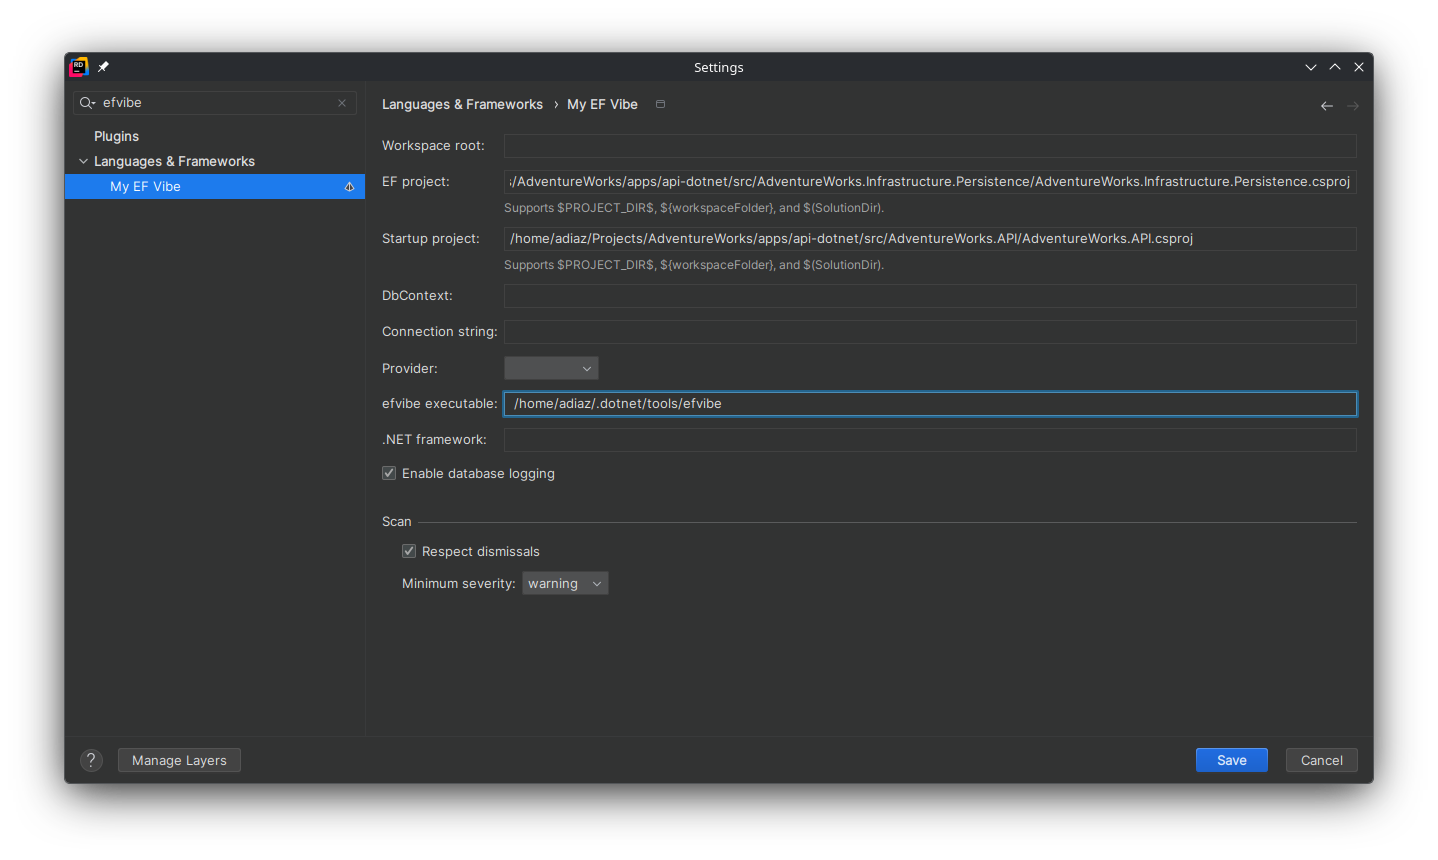
Click Apply or OK after setting the project values. -
Open the tool window
Open View > Tool Windows > My EF Vibe. The tool window defaults to the right side of Rider.
The tool window includes a resizable query editor and tabs for Result, SQL, Plan, Messages, Session, Model, Scan Review, History, and Notebook.
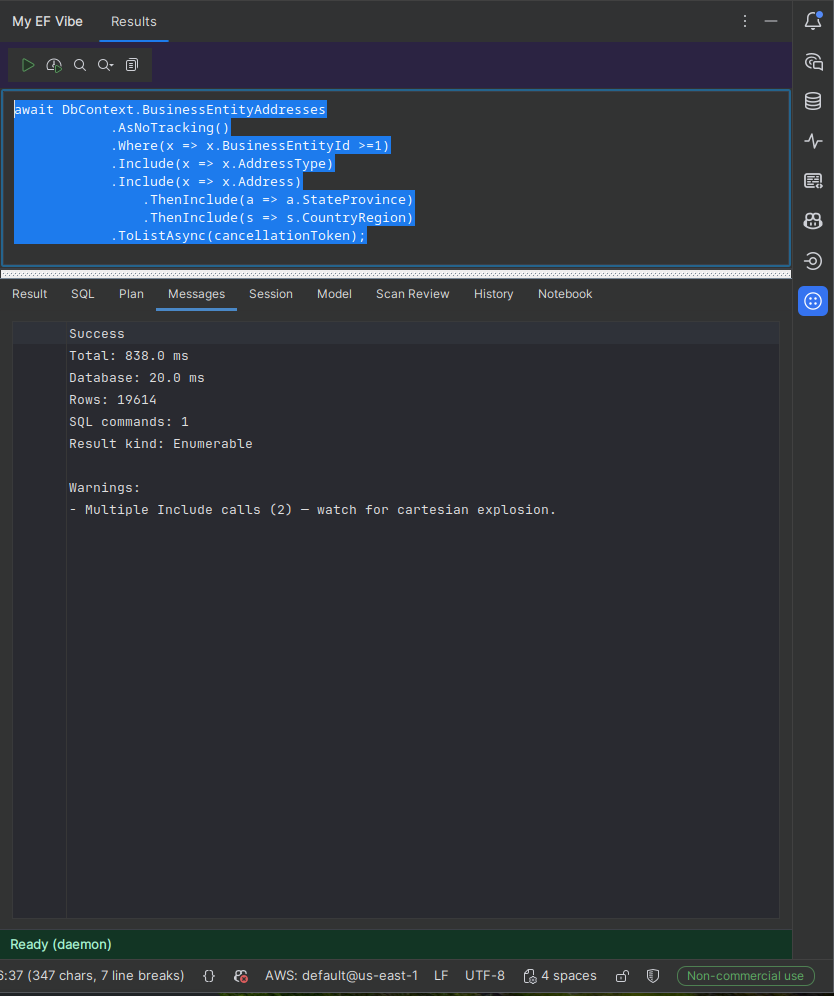
The query editor can be resized independently from the results area. -
Run a LINQ query
Type a query using
dbas the currentDbContext, then click Run.db.BusinessEntityAddresses .AsNoTracking() .Where(x => x.BusinessEntityId >=1) .Include(x => x.AddressType) .Include(x => x.Address) .ThenInclude(a => a.StateProvince) .ThenInclude(s => s.CountryRegion) .ToList(cancellationToken);The Result tab shows rows returned by the query. Use Export CSV or Export JSON in the Result tab to export the last successful run.
Click Run Plan to execute the query and immediately open the Plan tab.
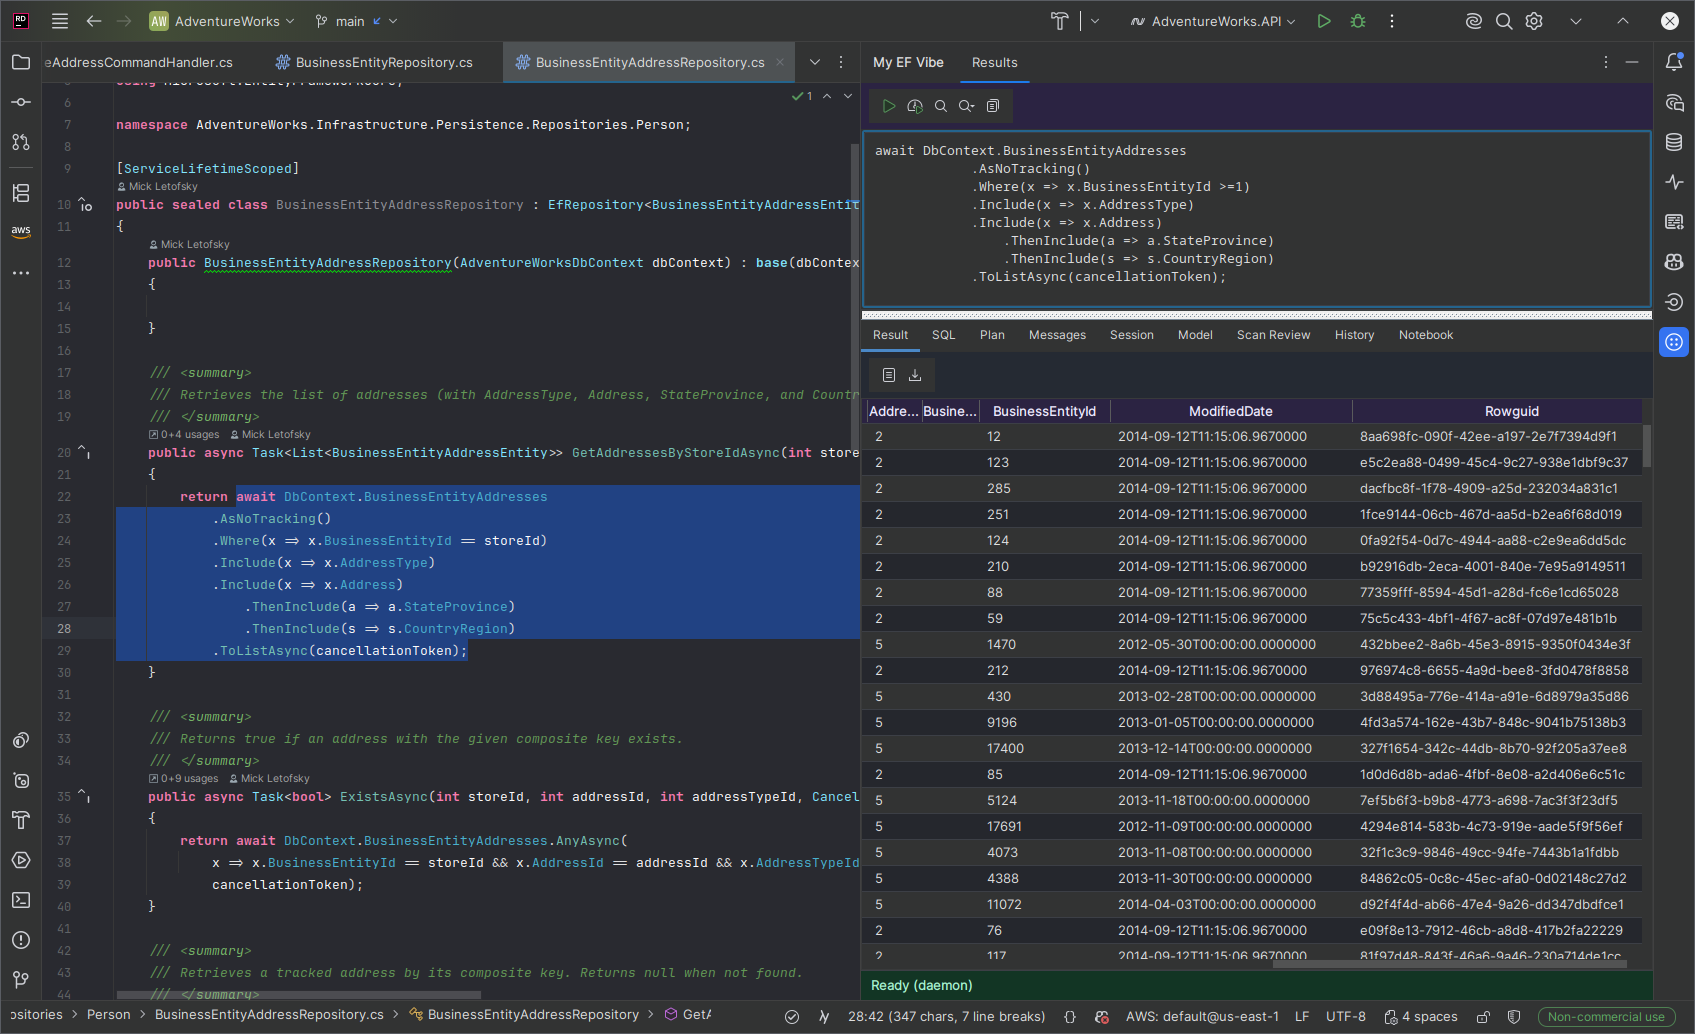
Run Selection prefers efvibe servefor fast repeated evaluations. -
Inspect the model
Open the Model tab to explore the configured
DbContext.- Db Info loads provider, connection, and DbContext details.
- Tables loads DbSets and entity types.
- Run Count counts rows for the selected DbSet.
- Run Sample runs
Take(10)for the selected DbSet. - Describe shows entity metadata.
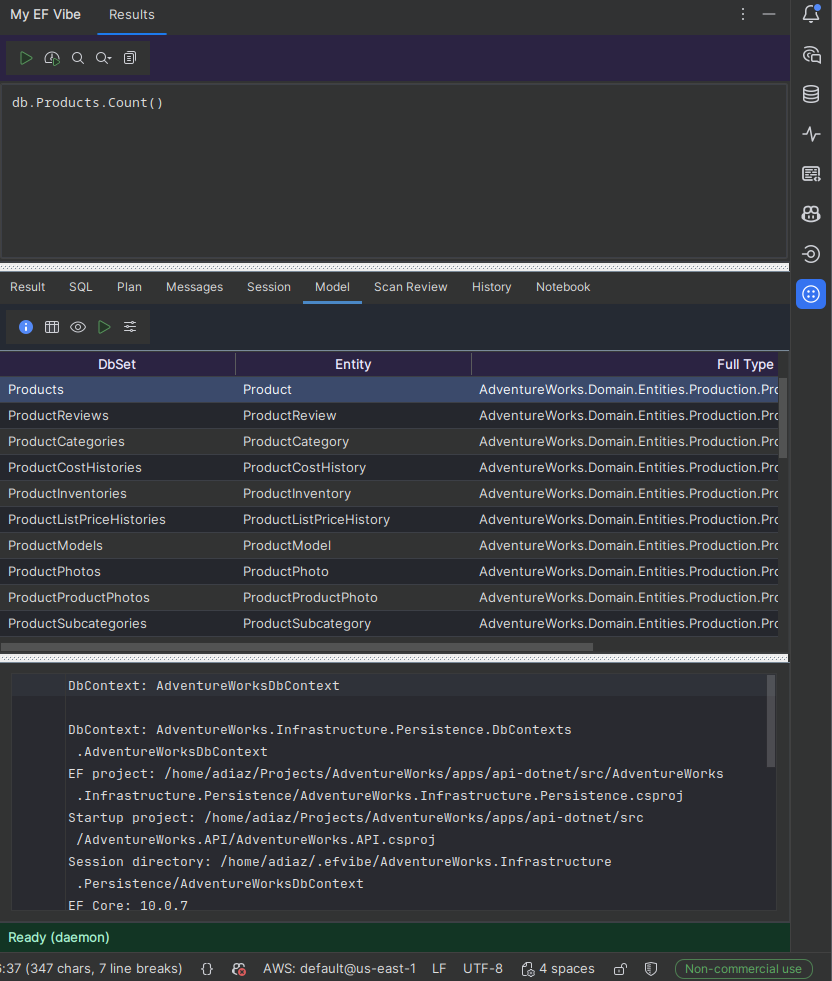
Select a DbSet before using Count, Sample, or Describe. -
Review scan findings
Click Scan Lite or Scan Deep. Results open in the Scan Review tab.
- Previous and Next move between findings.
- Go to code opens the source location.
- Note saves a note for the selected finding.
- Dismiss hides the selected finding from future scans that respect dismissals.
Deep scan includes translated SQL and provider query plans per finding. Aggregate probes (
Count(),Any(), …) translate to correct SQL in 0.6.x. -
Use notebooks
Open the Notebook tab to run multiple cells. Separate cells with
---.db.Products.Take(10) --- :dbinfo --- db.SalesOrderHeaders.Count()Each cell has Code and Result sub-tabs so you can edit the expression and read output side by side. Use Open and Save for
.efvibe-notebookfiles. Click Run All to execute every cell.
Troubleshooting
- If
DbContextresolution fails, confirm the startup project points to the app with validappsettings*.json(watch for malformed JSON) or user secrets. Connection strings live on the startup project (-s), not the EF library. - Oracle: AdventureWorks-style dumps use uppercase schemas (
PRODUCTION.PRODUCT). Current builds map PascalCase fluent config automatically; useefvibe 0.6.xand pass--connection-stringif config is not picked up from appsettings. - If commands cannot find the CLI, install
efvibeglobally, rundotnet tool restore, or set an explicit executable path. - If multiple target frameworks exist, set the .NET framework field to the same framework your app uses.
- If the tool window is missing, restart Rider and confirm Settings > Plugins > My EF Vibe is enabled.